You configure the server, users, selected protocols, routing and exposed management interfaces.
Protocol: SoftEther SSL-VPN and supported interoperable protocols.
SEE THE CONTROLS. FOLLOW THE STEPS.
Connect with SoftEther VPN Client Manager
Windows · SoftEther VPN Client · 8 steps
Connect to an authorized SoftEther server. This does not configure a VPN Gate relay, bridge or server deployment.
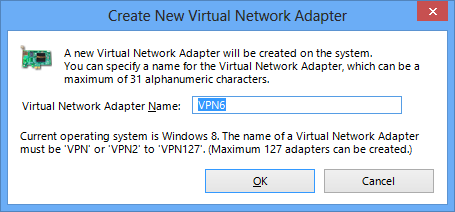
What you’ll do: Create an adapter, configure and verify a server connection, check useful access, and disconnect.
Documentation checked 2026-11-09. Source-based walkthrough; we have not deployed or tested this connection. Pictures are labelled by origin. Publisher screenshots can show older interfaces; use the linked current documentation when your version differs.
Version scope: SoftEther VPN Client Manager on Windows; exact Windows and client builds in the publisher screenshots are not stated.
Before you start
Install the official VPN Client, rather than Server Manager.
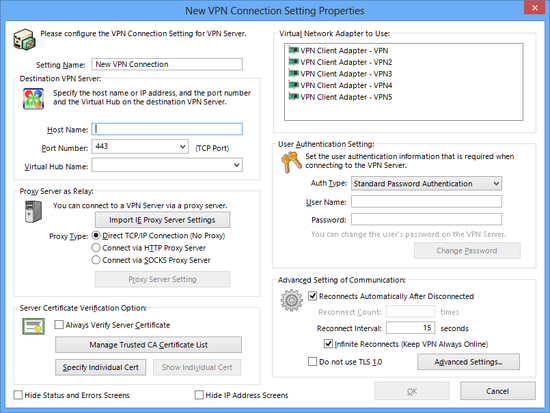
Obtain the server address, port, Virtual Hub, authentication details and certificate information.
Server
The operator’s hostname, port and Virtual Hub name.
Account
The specified authentication method and your credentials or certificate.
Trust & routing
Expected server certificate plus the adapter, address and DNS plan.
Use your own authorized account and configuration. Keep private keys, QR codes and sign-in codes out of shared pictures.
0 of 8 steps marked complete
Checkmarks help you follow the guide; they do not verify a connection. They reset when you reload.
STEP 01
Open VPN Client Manager
Install and open the SoftEther VPN Client component.
Use the project download and choose VPN Client for your platform.
Open VPN Client Manager; Server Manager is a different tool.
What you should see
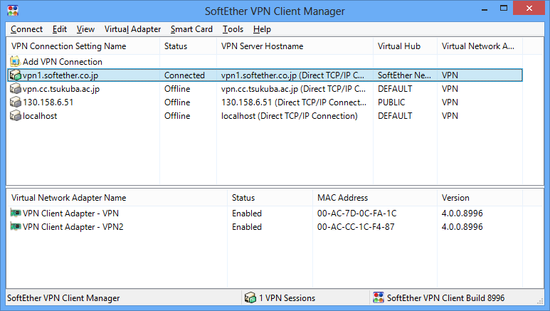
Client Manager shows connection settings and virtual adapters.
Confirm the address assigned to the virtual adapter and access to the intended network. Follow the operator’s routing and DNS plan.
The correct server and Virtual Hub session is connected.
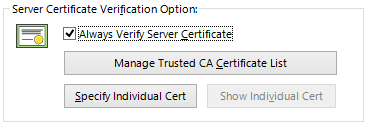
The server certificate is verified against the expected identity.
The selected virtual adapter reaches the authorized resource.
You can stop this session without disturbing unrelated connections.
If it does not work
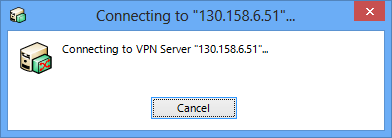
For a failed connection, read the status/error details and confirm the gateway, account and certificate rather than disabling encryption or identity verification.
Cannot establish the session
Confirm server name, port, Virtual Hub and credentials with the gateway operator. These fields refer to different parts of the connection.
Certificate warning
Verify the expected server certificate with the operator; retain verification rather than accepting an unexplained change.
Connected but no useful access
Check the selected virtual adapter and the gateway’s routing, address assignment and permissions. A connected session alone does not establish internet routing.
Stop or roll back deliberately
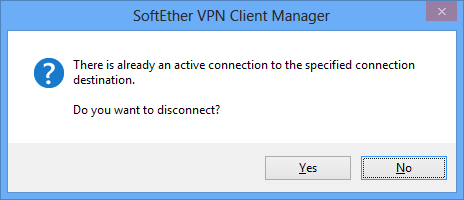
Disconnect the specific connection in Client Manager. Review startup connection settings if you enabled them; avoid deleting a shared virtual adapter merely to stop one session.
The software and a public volunteer relay network are different trust models. Self-hosting does not inherit anonymity from the project name.
Your hosting arrangement, physical server location, account records and browser identity still matter. Plan credential management, updates, DNS, routing and connection-failure behavior before relying on a deployment.
Documentation reviewed 2026-11-06. Project documentation reviewed; no independent security testing performed by StealthVPN. Use the project’s current installation and security guidance; platform support and configuration choices can change.
 (opens in a new tab)
 (opens in a new tab)
 (opens in a new tab)
 (opens in a new tab)
 (opens in a new tab)
 (opens in a new tab)