Install the official client, approve its network extension and make a first connection. This example uses a Proton account; Free and paid plans have different location and feature access.
Proton VPN
Proton is the documented example. No purchase is required to read the guide; Free and paid feature scope differs. Image sources.
SEE THE CONTROLS. FOLLOW THE STEPS.
Follow the setup steps.
macOS 15 (Sequoia) · Proton VPN app · 3 steps
Install the official client, approve its network extension and make a first connection. This example uses a Proton account; Free and paid plans have different location and feature access.
Documentation checked 2026-11-09. Source-based walkthrough; we have not deployed or tested this connection. Pictures are labelled by origin. Publisher screenshots can show older interfaces; use the linked current documentation when your version differs.
Version scope: Extension steps follow Proton’s documented macOS 15 flow. The current download supports macOS 14+; earlier OS versions have different steps. Exact app build is not stated in the source.
Before you start
Check About This Mac: this extension path is for macOS 15, not every Mac release.
Use the official Proton download matching your macOS version and your own account. Keep the existing network settings available for reference.
Use your own authorized account and configuration. Keep private keys, QR codes and sign-in codes out of shared pictures.
0 of 3 steps marked complete
Checkmarks help you follow the guide; they do not verify a connection. They reset when you reload.
STEP 01
Install the official application
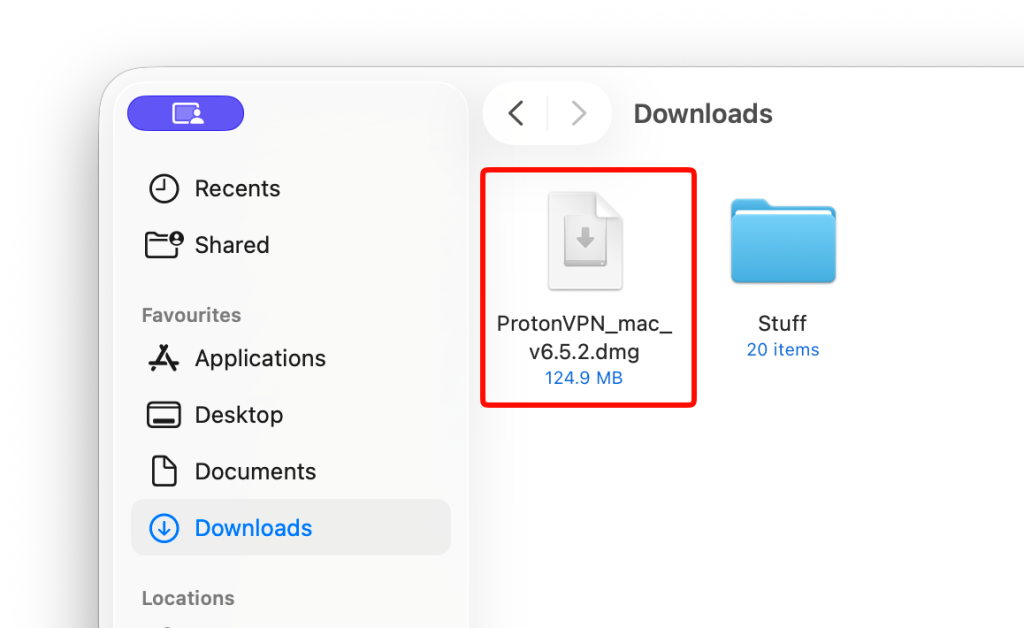
Get the matching DMG from Proton’s official download page. Open it and drag Proton VPN into Applications, then launch and sign in. If macOS rejects it, check the download origin and current vendor guidance before changing security settings.
What you should see
The installed app and account match the official publisher.
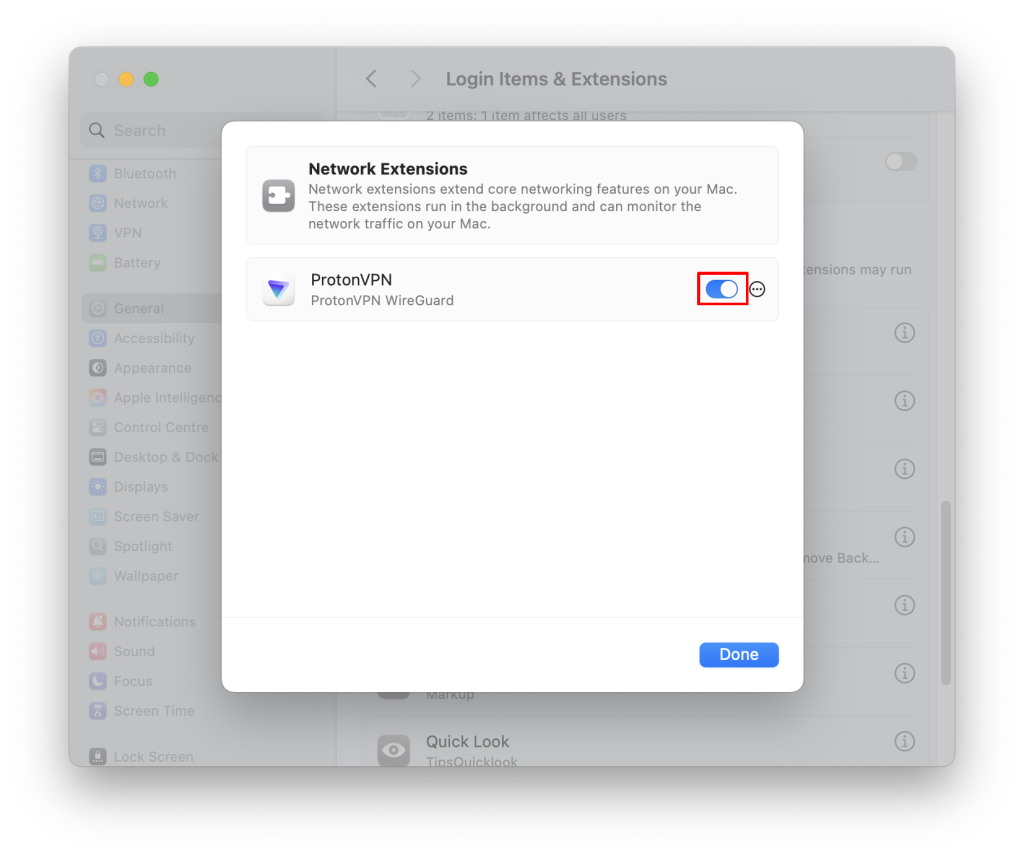
For the macOS 15 flow, open System Settings → General → Login Items & Extensions. Under Extensions, open Network Extensions and enable the ProtonVPN WireGuard extension. Approve the VPN configuration when the app requests it.
What you should see
The expected Proton extension is enabled; do not approve an unrelated extension.
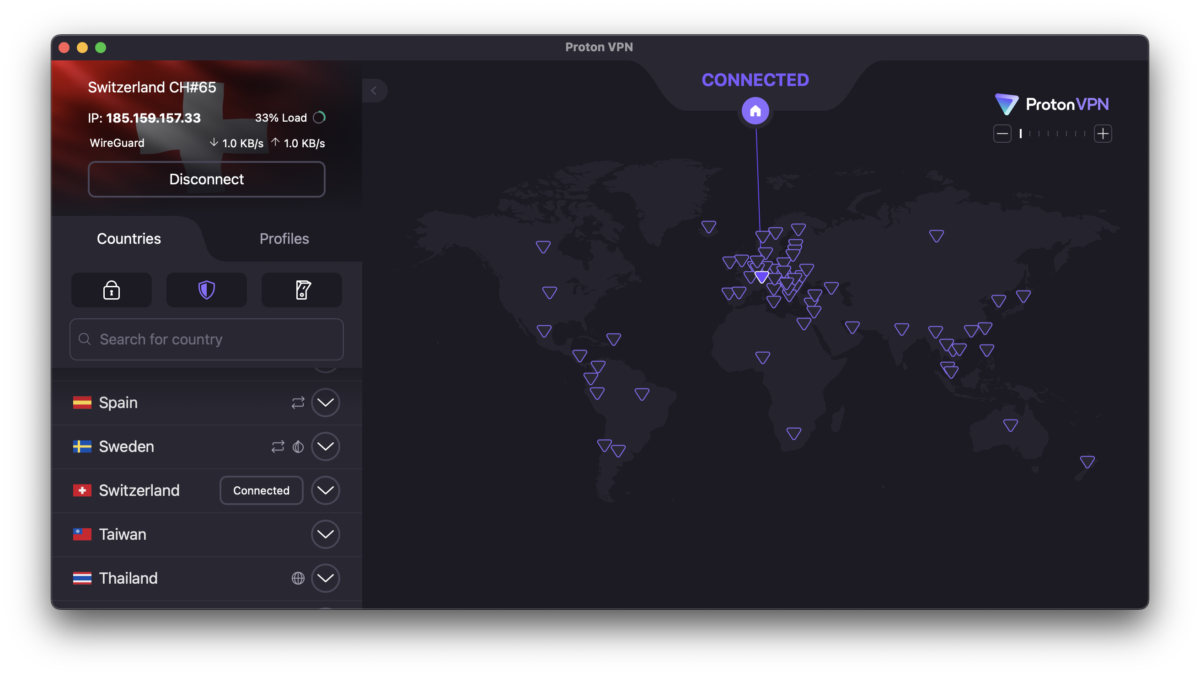
Return to the app and use Quick Connect. Note the reported connection state and try a normal HTTPS site or your intended authorized task. Check the exit only if the task needs one; an exit change is not an anonymity test.
What you should see
A useful connection plus a known way to stop it. Paid-only location or feature controls may not be available on Free.
Check the app state and actual use together. You have configured a client, not proved its security under every failure condition.
The correct extension and VPN configuration were approved.
The app connects and your intended task works.
You know the plan’s location and feature limits.
You can disconnect and understand the chosen failure-blocking behavior.
If it does not work
Start with the app’s connection information and the vendor’s macOS troubleshooting page.
Extension approval is missing or different
Check the macOS version first. Proton’s linked instructions explicitly use macOS 15; earlier releases have another approval path.
App cannot connect
Check the vendor’s macOS troubleshooting flow and record the app/OS version. Avoid clearing app data as an unexplained first step; it may remove settings.
Internet remains blocked after disconnecting
Review kill-switch and automatic-connect choices in the app. Decide whether traffic should remain blocked before changing them; disabling protection can permit direct traffic.
Stop or roll back deliberately
Choose Disconnect in the app. Review automatic connection and kill-switch settings deliberately before quitting it; ordinary internet access and blocking are different intended outcomes. Restore only settings you changed, using your earlier notes.
 Proton VPN
 (opens in a new tab)
 (opens in a new tab)
 (opens in a new tab)