Use an existing .conf from a gateway you are authorized to access. Proton’s manual guide is the worked example; a workplace or private gateway may issue a different profile. The gateway and device peer must already exist.
SEE THE CONTROLS. FOLLOW THE STEPS.
Follow the setup steps.
iOS / iPadOS · official WireGuard app · 3 steps
Use an existing .conf from a gateway you are authorized to access. Proton’s manual guide is the worked example; a workplace or private gateway may issue a different profile. The gateway and device peer must already exist.
Documentation checked 2026-11-09. Source-based walkthrough; we have not deployed or tested this connection. Pictures are labelled by origin. Publisher screenshots can show older interfaces; use the linked current documentation when your version differs.
Version scope: Documented file-import flow for the official WireGuard iOS/iPadOS app. The screenshots are published by Proton; the source does not specify the exact app or OS build. Check the App Store requirements for your device.
Before you start
Install the official WireGuard app through the installation link on wireguard.com.
Get a device-specific profile from your authorized gateway operator. Do not upload it to a conversion site or share its QR code: configuration can contain a private key.
Use your own authorized account and configuration. Keep private keys, QR codes and sign-in codes out of shared pictures.
0 of 3 steps marked complete
Checkmarks help you follow the guide; they do not verify a connection. They reset when you reload.
STEP 01
Obtain the device profile
For the Proton example, sign in on the official account site and use Downloads → WireGuard configuration. For another authorized gateway, obtain its profile from the operator instead. Keep the .conf private.
What you should see
The profile is intended for this device and the gateway you expect.
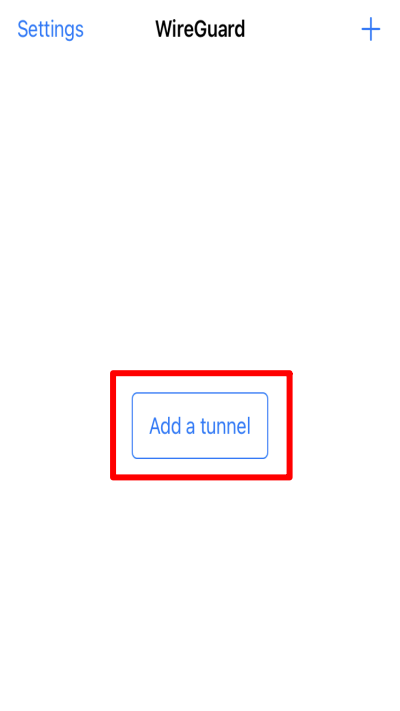
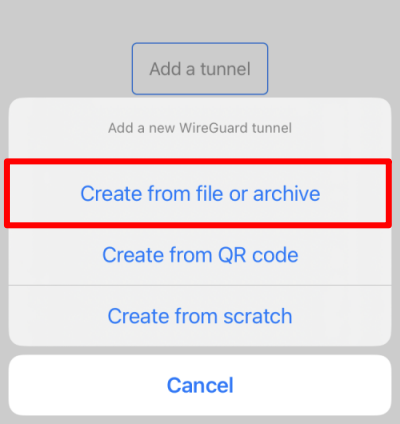
Open WireGuard, choose Add a tunnel, then Create from file or archive. Select your .conf and approve the iOS/iPadOS VPN-configuration request for the intended app. A saved configuration does not mean the remote peer is reachable.
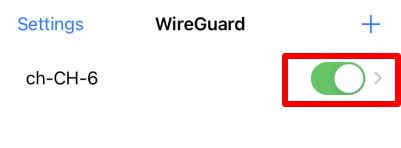
Turn on the switch beside the imported tunnel. Try the destination the operator authorized. Internet exits and private-subnet profiles have different route goals; ask the operator if you do not know which this file uses.
What you should see
Your intended destination works, not merely a local on switch.
A successful visit to the intended resource is a useful functional check. It does not establish leak protection, failure behavior or parity with a managed provider app.
The imported profile belongs to this authorized device.
The tunnel reaches the intended gateway and destination.
You know which traffic the profile is intended to route.
You can stop it and keep configuration material private.
If it does not work
Match the profile, registered device key and route scope with the gateway operator.
Import fails
Confirm this is a WireGuard .conf for the intended device, not an OpenVPN profile or a screenshot of one.
Tunnel turns on but resource fails
Confirm the gateway endpoint, registered peer and AllowedIPs with the operator. A default internet route and a private-network route are different.
Tunnel returns after switching off
Review any on-demand or automatic connection settings you enabled. Do not assume a manual import has every feature of a provider’s own app.
Stop or roll back deliberately
Turn off this tunnel in WireGuard and review any on-demand setting you enabled. Verify the result before deleting the profile; retain a protected original if you still need access. Ask the operator to revoke and replace a key if it was exposed.
 (opens in a new tab)
 (opens in a new tab)
 (opens in a new tab)